

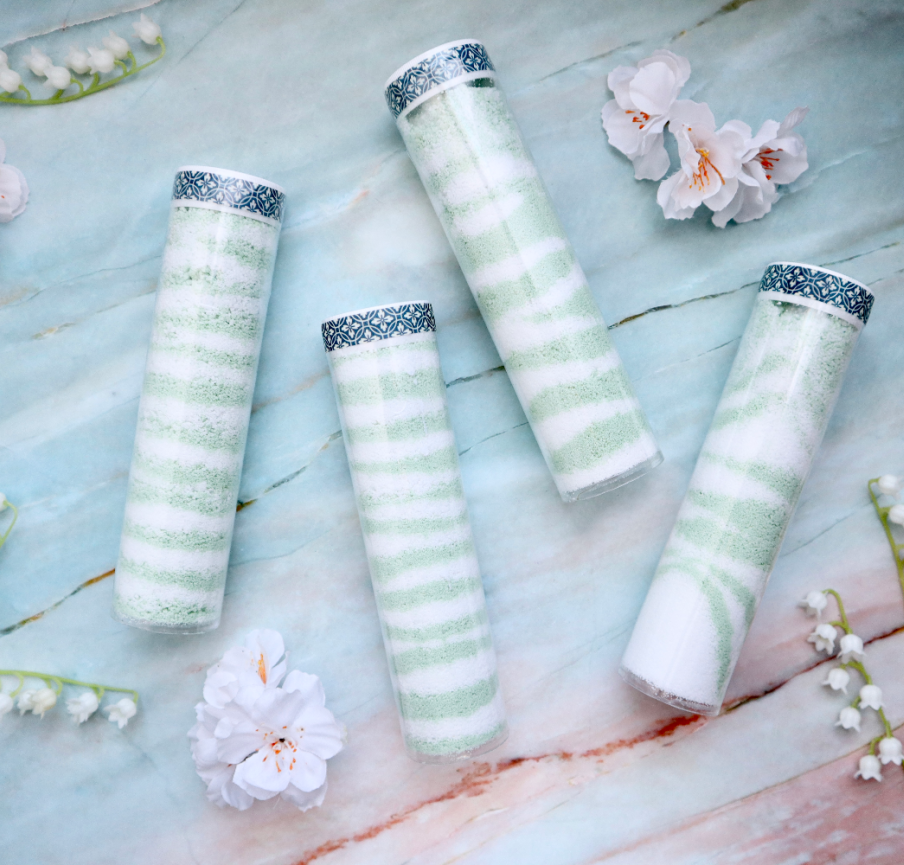
Whether you pour plain Epsom salt into your tub or make a fun bath salt recipe, bath salts instantly make any soak in the tub more enjoyable. Today we’re going to show you how to make fun layered bath salts. Although it might look like a lot of work, this recipe is beginner-friendly and can be completed in under an hour. You only need a few supplies to make these professional-looking, layered bath salts.
This recipe uses Green Clover & Aloe fragrance oil and green mica. With this color and fragrance combo, it’s the perfect St. Patrick’s Day project to make for yourself, give as a gift or sell in your shop!
If you don’t want to make a themed bath salt shot, it’s super easy to change the color and fragrance to anything you like. Just remember to check the IFRA statement if you are switching the fragrance. Only use skin-safe fragrances, and be sure to check the maximum usage level.
Skill Level: Easy
Hands-On Time: 45 minutes
Yield: 6 Bath Salt Shots (4 oz each)
Supplies
- 6 packaging tubes
- 6 shrink wrap bands (65 x 55 mm)
- 2 mixing bowls
- Plastic pipette
- Whisk
- Digital scale
- Micro scoop
- Spoon or spatula for stirring bath salts
- Small spoon for packaging bath salts
- 2 baking sheets
- Tin foil
- Heat gun or hair dryer for sealing the shrink wrap
Ingredients
- 24 oz Epsom salt
- 4 oz baking soda
- 4 to 8 micro scoops Apple Green Mica
- 2 to 4 ml Green Clover & Aloe fragrance oil
Project Overview
We will start by weighing the Epsom salt in two separate bowls. Next, we will add equal amounts of baking soda and fragrance to both bowls. Finally, green mica is added to one of the bowls. The other bowl is left white so we can create layers in our bath salt tubes.
Next, we will spread the bath salts on baking sheets and bake them on low heat. You don’t have to bake your bath salts, but it is a great technique for making bath salts that don’t clump. After the bath salts are cool and dry, they are spooned into the packaging tubes in layers. Finally, a shrink wrap band is used to seal the tubes shut.
Note: If you choose not to bake the bath salts, make sure they are dry before you package them.
Video Tutorial for Making Layered Bath Salts
Please note that the video shows us using Sea Green and Green Yellow mica rather than Apple Green, as specified in the ingredient list. If you want, you can use 4 scoops of Sea Green and 2 to 4 scoops of Green Yellow mica (like we did) to create a color similar to Apple Green.
Step-By-Step Instructions for Making Baked Bath Salts
- Preheat your oven to 175 degrees F, or its lowest heat setting.
- Using your digital scale, weigh out 12 oz of Epsom salt into a measuring bowl. In a separate measuring bowl, weigh another 12 oz of Epsom salt. You will have two separate bowls with 12 oz of salt.
- Add 2 oz of baking soda to each bowl.
- Using a plastic pipette, add 1-2 ml of Green Clover & Aloe fragrance oil to each bowl and stir.
- Set one bowl aside for later. The salt in this bowl will stay white.
- In the other bowl, add 4-8 micro scoops of Apple Green mica powder. Use 4 scoops to create a more pastel green, or up to 8 scoops if you want a more intense color.
- Prepare two baking sheets by lining them with tin foil. Make sure the foil covers the bottom and sides of the pan. If the foil is thin, you may want to double-layer it.
- Put the white salts on one baking sheet and the green salts on the other sheet.
- Spread the salts out evenly on the baking sheets using the back of a spoon. Be careful not to rip the tin foil.
- Place both baking sheets in the oven for 15 to 20 minutes total, removing the pans to stir the bath salts every 5 minutes.
- Once dry, remove the baking sheets from the oven and let the bath salts cool completely.
- While you wait, clean the bowls that you used to mix your bath salts. Make sure the bowls are completely dry.
- Carefully transfer the bath salts back into separate bowls. An easy way to do this is to gently pick up the side of the foil to make the salts pile up in the center of the baking sheet. Carefully grab the edges of the foil and lift it up, holding the bottom of the foil to support the weight of the salts. Then tilt the foil to pour the salts into the bowl.
- Add one spoonful of white salt to each packaging tube, followed by one spoonful of green salt. Repeat this process until the tubes are full, alternating between white and green salt to create layers. To keep the layers from shifting or blurring together when the tube is handled, fill the tubes all the way to the top. Then pop the lids on.
Fun Packaging Ideas
We love using packaging tubes in our projects because of how versatile they are. There are a few fun ways to dress up packaging tubes to make your project stand out. Here are a few ideas:
- Cut out a circle of decorative paper that’s 1 3/8” in diameter. Scrapbook paper works great. This diameter will fit perfectly inside the indentation on the lid. Place it on top of the lid before using a shrink wrap band. Once you apply the shrink wrap, the plastic will hold the paper in place.
- Wrap a decorative piece of Washi tape around the lid before applying the shrink wrap band. The shrink wrap band will hold the tape securely in place. There are hundreds of cute Washi tape designs to choose from!
- Create on-trend labels by designing a long, narrow label that you can place vertically along the packaging tube.
- Tie a decorative ribbon or string around the top and tie a label to it.

How to Shrink Wrap Your Bath Salt Shots
The lids of our bath salt packaging tubes will stay securely closed without a shrink wrap band. However, shrink wrapping the lid shut will add a professional touch. Sealing the lids with shrink wrap is highly recommended if you plan on selling these bath salts.
Follow these easy steps to shrink wrap your bath salts:
- Place a 65 x 55 mm shrink wrap band around the lid.
- Position the shrink wrap so that approximately ¼ to ½ an inch of the plastic extends above the lid.
- Holding the plastic in place, point your heat gun (or hair dryer) at the sides of the tube until the plastic begins to shrink. The plastic should now stay in place without being held.
- Keeping the tube upright, rotate the tube so that the heat touches all of the sides.
- Next, point the heat gun at the plastic that extends above the lid. It will begin to shrink towards the center of the lid.
- Continue moving the heat around until the plastic is completely tight.
Tip: For best results, hold the heat gun at an angle so the heat moves across the surface of the plastic rather than pointing directly at it. Maintain this angle as you move the heat gun over the entire surface of the plastic. When the heat runs parallel to the surface of the plastic rather than pointing directly at it, the plastic should become smooth and snug, creating a perfect seal without any ripples in the plastic.
Tips for Making Professional Looking Bath Salts
It’s easy to make baked bath salts, but we wanted to share a few additional tips that will guarantee this project is a breeze. These pointers will help your bath salts turn out just the way you want them to:
- If your baking soda is lumpy, sift it before adding it to the Epsom salt. It’s often hard to remove clumps in baking soda after it’s mixed with other ingredients.
- During baking, some of the salt may clump together. After letting the bath salts cool, try to break up the larger clumps with the back of a spoon. Lumps aren’t the end of the world, but having a lumpy mixture will make it much harder to create nice, neat lines in your bath salt layers.
- You can choose any layering pattern you want when packaging the bath salts. Here are some ideas:
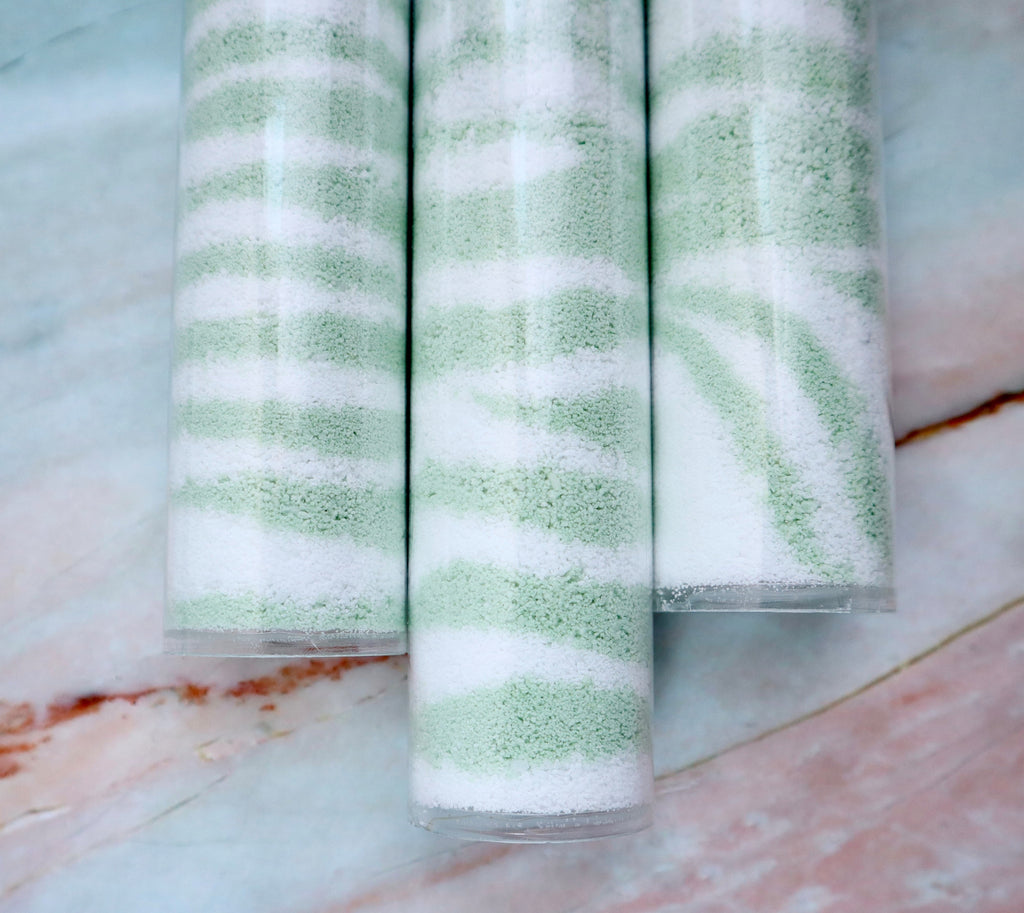
- To make perfectly neat, stripey layers, it helps to rotate the tube as you add each scoop, while simultaneously shaking the spoon to distribute the mix evenly. Tap the bottom of the tube gently on the table after each layer to get crisp, even lines between your layers. When adding each layer, try to scoop up the same amount of mixture each time so they are all uniform.
- To create a cool freeform pattern, simply spoon the mixture in at random angles, alternating between white and green.
- To create slanted layers, hold the tube at an angle when scooping in the mixture. You can hold the tube at different angles to create cool patterns.
- It’s faster to use the same spoon to scoop the white and green salts. However, it’s also easy to accidentally mix the colors when using one spoon. Make sure there isn’t any leftover mixture on the spoon when switching colors.
- Tap the packaging tube on the table after you make each layer. This will help the salts settle and remove air pockets. When you follow this process for each layer, the salts will be packed tightly and your layers won’t slide around if the tube is put on its side.
- To ensure each bath salt shot holds the same amount of mixture, aim to put about 4 oz of salt in each tube. Packaging tubes can hold approximately 6 oz of plain, unbaked Epsom salts. However, the process of baking bath salts tends to make the salt more fluffy and less compact, meaning the tubes will only hold about 4 oz of baked salts.
Did you try this recipe? We’d love to see how it turned out! Share your project on social media with #MadeWithNorthWood
NorthWood is not responsible for any products that you make with our supplies or recipes.